

Do I have to swatch?
We’ve all asked this question at one time or another. You’re in the grips of the excitement of starting a new project, and you just want to get going immediately. But then comes those dreaded phrases – “adjust needle size as needed to get gauge”, “please swatch to ensure adequate yarn”, “swatch to avoid disappointment”. Argh!
Even though I am firmly in the camp of Swatching Is Good, I still get frustrated by having to pause in my casting on frenzy, knit a square, block it, wait for it to dry, measure it, and repeat ad infinitum until I get close to the recommended gauge. In this post I’m going to talk about why swatching is important, how to swatch, and then discuss three factors that will play a big role in whether or not your swatch tells the truth.
Why swatching is important:
You certainly don’t have to swatch – there are no swatching police. But if you want your project to end up the correct size and match the schematic measurements, swatching is critical!
Some years back when I was at university and had gotten back in to knitting (there is not much else to do in northwestern Massachusetts in the winter), I embarked on a grand project to knit myself an all-over cabled jumper. I went to the yarn shop, stocked up on yarn, got my pattern and started to knit – gauge was not even on my radar. I got through the back and halfway up the front before I ran out of yarn. Back to the yarn shop, more yarn and on I went. Three-quarters of the way through the first sleeve I ran out of yarn again, and headed back to the shop (you can see where this is going, right?). I ended up with a beautiful sweater encrusted with gorgeous cables. It was truly a work of art and I was justly proud of it. The only problem was that it fit me with 16” of ease. For those of you on the metric system, that’s 40 cm. I could have fit myself, my entire crew team and a couple of cats in there for extra measure.
Please learn from my mistake: swatch. Particularly if you are starting a project for which fit is essential (jumpers or socks for example), swatching can save you hours of wasted time and considerable heartbreak!
How to swatch:
There’s no gold standard protocol for how to swatch correctly, but there are some general guidelines. Most importantly: make your swatch big enough! The minimum size for a swatch is 4 x 4”/10 x 10 cm, but I’d definitely recommend making one bigger then that if you can stand it. Casting on 10 sts, knitting for 12 rows and casting off does not make an adequate swatch, even in super bulky wool.
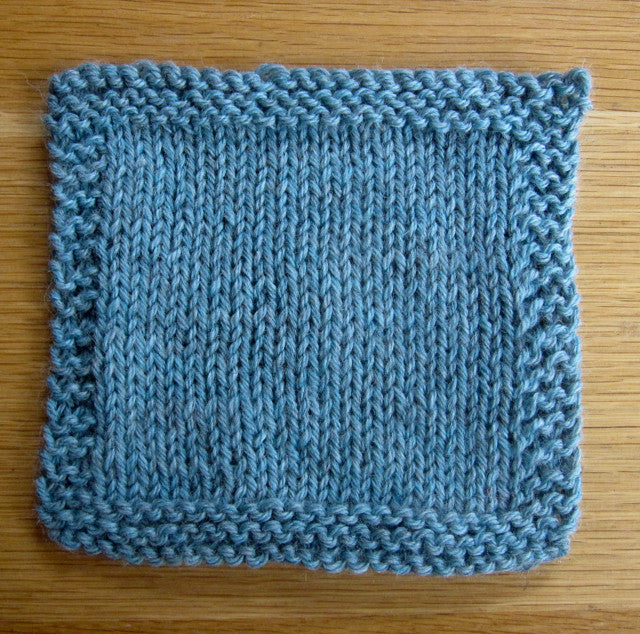
Work a garter stitch border around your swatch so it will lie flat when it’s finished. For all the swatches pictured below I cast on 26 sts and worked the first and last three stitches of each row in garter stitch, with 6 rows of garter to start and finish.

If you project is knit in the round, please swatch in the round! You don’t actually have to work a tube – use circular or double pointed needles, cast on and work one row. Slide the work to the other end of the needle and work the next row, leaving a long float across the back of the swatch so there’s plenty of room for it to lay flat when you’re done. Keep going until the swatch is the size you want, bind off, and block. You can cut the floats if you like, but just be sure to fasten them off at the edges in some way so that the stitches are even along the edges.
Also make sure to finish your swatch as you are going to finish your finished project. If you plan to steam block the piece, steam block the swatch. Pin or smooth it out as you will the final project. Let it dry. Then go back and measure the gauge.

To measure the gauge lay the swatch out flat without stretching or pulling. Take a ruler or a measuring tape and lay it across the portion of your swatch between the garter edges. Measure this section and then divide it by the number of sts in the swatch (not counting the edges). Do the same for the row measurement. Then you can extrapolate to sts/rows per inch/cm.
A word about interpreting measurements: swatches with looser gauge will have fewer stitches or rows per unit measure. Swatches with tighter gauges will have more stitches or rows per unit measure.
OK, let’s take a look at some factors that will affect your gauge and how those factors can be used to your advantage.
Stitch pattern:This may seem completely obvious, but the stitch pattern that you use for your swatch will affect your gauge dramatically. Case in point: the three swatches below were all knit on the same needles with the same number of stitches cast on and the same number of rows. They were all blocked the same way.

The swatch knit in stockinette has a gauge of 20 sts/10.8 cm and 26 rows/10.3 cm. The cabled swatch has a gauge of 20 sts/8.3 cm and 26 rows/10 cm. The lace swatch has a gauge of 20 sts/13.5 cm and 26 rows/10 cm.
|
Swatch |
20 sts |
26 rows |
Sts/rows per cm |
|
Stockinette |
10.8 cm |
10.3 cm |
1.85 sts/4.38 rows |
|
Cables |
8.3 cm |
10 cm |
2.41 sts/2.6 rows |
|
Lace |
13.5 cm |
10 cm |
1.48 sts/2.6 rows |
Cables draw fabric in dramatically, while lace patterns open the fabric up and give fewer stitches per cm, as you would expect.
Now there is certainly a problem when the pattern you’re working is in a stitch pattern of some kind but the gauge is given in stockinette. In that instance, you may need to swatch both patterns and see how your gauge changes between the two. If they’re the same, you’re good to proceed.
Tools:Strangely enough, the type of needles you use may have an impact on your gauge. The four swatches below were all knit with 5.0 mm needles, but the type of needle varied. One swatch was knit on metal needles, one was knit on plastic needles, and two were worked with wooden needles – one set smooth and polished, the other set rougher and stickier. All swatches were knit over the same number of stitches for the same number of rows, and were blocked.

Here’s how the gauge came out:
|
Swatch |
20 sts |
26 rows |
Sts/rows per cm |
|
Metal needles |
12.8 cm |
11.7 cm |
1.56 sts/2.22 rows |
|
Plastic needles |
11.8 cm |
11.6 cm |
2.20 sts/2.24 rows |
|
Wooden needles (smooth) |
11.4 cm |
10.5 cm |
1.75 sts/2.47 rows |
|
Wooden needles (rough) |
12.5 cm |
11 cm |
1.6 sts/2.36 rows |
You can see that the plastic needles gave the tightest stitch gauge, while the rough wooden needles gave the loosest stitch gauge. Metal and plastic needles gave similar row gauges, while wooden needles had looser row gauges. Generally speaking, smoother needles will give tighter gauges, while rougher needles will hold on to the yarn and give a looser fabric at the same needle size.
The take home message from this experiment is that if you are swatching and having trouble getting correct gauge, but changing to a different needle size is too dramatic a difference, try a different type of needle.
Fibre choice:
I wrote in my last post (link) about the importance of fibre choice and how it can affect your finished object, and all of those suggestions still hold true. But this also comes in to play when answering the second most common question I hear about swatching: do I really have to block my swatch?
Yes, you really do have to block your swatch. For some fibres this is more important that others, but very often yarns will change when they’re washed. Many commercial yarns are treated to make them easier to skein or wind into balls, and washing that stuff out in blocking makes the yarns bloom and can change the gauge. Similarly, some particular fibres (even untreated) will change with washing, becoming plumper or developing a halo. There isn’t always a huge gauge change when the fabric is washed, but you should always wash and block your swatch exactly as you plan to wash and block your finished object.
Superwash wools are an example of how blocking can really influence gauge. The three swatches below were all knit on 4.0 mm needles over the same number of stitches and the same number of rows but they were all finished differently. The swatch on the left wasn’t blocked, the swatch in the middle was wet blocked but left to air dry flat, and the swatch on the right was wet blocked and dried in the clothes dryer.

|
Swatch |
20 sts |
30 rows |
Sts/rows per cm |
|
Unblocked |
10 cm |
11 cm |
2.0 sts/2.73 rows |
|
Blocked, air dried |
9.9 cm |
10.7 cm |
2.02 sts/2.8 rows |
|
Blocked, machine dried |
9.6 cm |
9.6 cm |
2.08/3.13 rows |
For this particular superwash yarn, blocking slightly decreased the stitch gauge, but really changed the row gauge, particularly when the swatch was dried in the machine. Since superwash yarn is marketed as being machine washable and dryable, this is going to have an affect on your project.
But not all superwash yarns are the same! Here’s another example, swatches knit on 5.0 mm needles and worked/finished as the previous set.

|
Swatch |
20 sts |
30 rows |
Sts/rows per cm |
|
Unblocked |
10.7 cm |
11.6 cm |
1.87 sts/2.58 rows |
|
Blocked, air dried |
11.6 cm |
11.6 cm |
1.72 sts/2.58 rows |
|
Blocked, machine dried |
11.2 cm |
9.9 cm |
1.76/3.03 rows |
For this particular superwash yarn, blocking reduced the number of stitches per cm. When the blocked swatch was then dried in the machine, the stitch gauge increased slightly but the row gauge tightened up dramatically.

While the variations in all these measurements may seem very small, keep in mind that over the body of a jumper for someone my size (bust circumference of 101.5 cm), a difference of 0.1 st/cm works out to just over 10 cm of difference in the size of the finished garment. Not quite up to my 40 cm standard, but enough to make a serious difference in the fit! As is evidenced by the photo above - this is the back piece of the first sweater I ever made for myself, I was at Uni and when completed myself and two roommates fit into it... So with that in mind, get out there and swatch!
- Rachel
You can find Rachel as @porpoisefur on Twitter and Instagram.
Gr8NW on
Thank you for this, it is very instructive!